

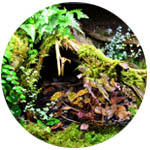

The Vivarium Building Checklist
An introductory guide concerning what to do, what to avoid, and what you'll need when building a live vivarium environment

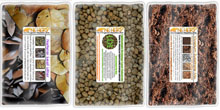
Live Vivarium Ingredients List:
A list of necessary & suggested basic parts you'll need to get a vivarium started off right!
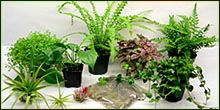
Necessary Basics
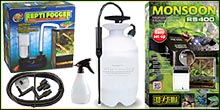
Worthwhile Add-Ons
10 Important Points Towards Building A Professional-Grade Vivarium
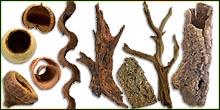
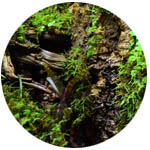
We suggest cleaning or sterilizing plants, rocks, wood, leaf litter, and anything else you'll be using that's able to be sterilized. This is the #1 most overlooked step in vivarium building, and one of the things that sets good husbandry apart from great husbandry. Skipping sterilization adds a risk of introducing pests and/or pathogens into your vivarium which can cause trouble for it's inhabitants, destroy the enclosed plants, or both! For plants, we have a plant processing page dedicated to explaining how to do this properly. Non-sensitive hard decor items that are small enough to fit into a large pot (wood, leaf litter, accent items, hides, etc) can be carefully boiled for a few minutes and allowed to cool before introduction.
Considering putting multiple species in a vivarium together? Doing so in almost every case goes against the general consensus of the vivarium building community, as it offers no tangible benefits, and plenty of drawbacks to both the vivarium itself, as well as it's inhabitants. Doing so can result in co-habitant aggression, pathogen/parasite transmission, and unnecessary stress... All of which can lead to the death of the inhabitants. Furthermore, it allows for the risk of creating unnatural hybrids.
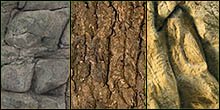
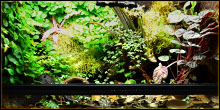
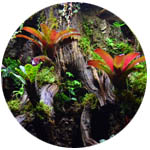
Topics like drainage, aeration, pH balance, resistance to breaking down, and the ability to support flora + microfauna life long term should all be considered when choosing a vivarium substrate. Despite what you may have heard, coconut fiber, peat, top soil, and/or potting soil are not acceptable substrates for long term success in a live temperate/tropical vivarium. All of those substrates will compact over time in a humid vivarium environment, and will not support plant or microfauna life long-term. Once compacted, a dangerous anaerobic soil condition can occur if the issue isn't addressed quickly. Using a soil with "organic fertilizers" often means it includes bat, cattle, horse, or chicken manure, which have the potential to carry pathogens into your vivarium. If you are new to vivarium building, read up on ABG mix or NEHERP vivarium substrate. Both choices use a blend of different ingredients, making them long lasting & inexpensive options designed specifically for vivarium use. If you'd like to learn more, our Vivarium Construction 101 article explains the importance of substrate choice in significantly more detail.
Vivariums should be designed around & built to house a specific species; and the inhabitant should never be chosen "as an afterthought" once it's built. Each animal species is different; and the habitat in which they are housed should reflect this. An experienced vivarium builder can look at a properly designed vivarium and take an educated guess as to a list of species it could appropriately house. The type of animal you'll be housing will influence the decision on substrate, lighting, microfauna, plant choice, background choice, and more. Always put the inhabitant's environmental needs before any aesthetic goals set for the project. Remember; although we'll be looking at it, the animal will be living in it.
Quarantining a newly acquired pet is the process of placing it in a temporary home away from other vivariums/pets for a period of time, before introducing it to it's permanent home. This provides time to ensure no health issues will present themselves, while keeping the animal away from any other pets to prevent possible cross-contamination. Most responsible hobbyists commit to a 14-45 day quarantine period for new acquisitions, with the longer options being the best bet. During quarantine, any underlying health issues may present themselves for an easier diagnosis, and the temporary home allows for easy collection for fecal testing at a vet. Ideally, fecal testing can be done for newly acquired pets even if they show no symptoms in an attempt to ensure the animal is healthy before ending the quarantine period. Hobbyists will often commit to a closely-inspected quarantine period without fecal testing, which is better than nothing, but not quite ideal. Read more about preventing cross contamination in our Vivarium Construction 102 article. Each newly acquired animal should be quarantined and ideally fecal tested by a vet in your area before introducing it to a vivarium and/or your collection.
An exotic pet isn't exactly something every "normal vet" will know how to diagnose and treat. Find a local breeder and/or vet in your area that can give you a hand if/when you need it. Having someone who can offer experienced advice that's just a phone call away can make a big difference in the long run. Before you commit to a specific Veterinarian, you might want to call around to investigate differences between costs for common situations. Ask about exotic visit fees (mention your specific species), fecal test fees, and whether or not they make office visits mandatory for fecal testing. Pricing and policies may vary depending on your specific location.
Unless you are working with a species that's very difficult to obtain captive bred (often abbreviated CB), there's usually no good reason to buy a wild caught (WC) animal. Wild-caught specimens have a higher chance of a parasite load, a harder time adjusting to life in captivity, and buying WC grows the demand for species being taken (sometimes smuggled) from the wild. Many species are available CB for a couple bucks more (and sometimes the same price), and purchasing CB is always worth the peace of mind. Plus, buying from a breeder offers a better warranty, and often provides you with somewhere to go when you have questions. Certain species are nearly always wild caught including Fire Bellied Toads, Green/Brown Tree Frogs, Anoles, Box Turtles, House Geckos, Iguanas, Tokay Geckos, Golden Geckos, and even some Chameleon species. Generally speaking, these wild caught animals don't make the best captive pets, and you'd be better off finding a breeder online than purchasing any of these species at a pet store. If it's not marked as 'captive bred', and/or the store can't tell you who bred the animal, it's probably wild caught. If purchasing a wild-caught species is necessary (certain species are new to the market, or rare in captivity), be sure to quarantine, test, and treat the animal (#5, above) when received to be safe.
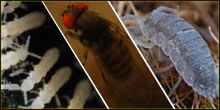
If you have a hard time dealing with tiny little bugs, vivarium building might not be for you, since both Springtails and Isopods are both incredibly useful (arguably critical) for the long term success of a true live vivarium. Springtails, Isopods, free-living nematodes, and detritivore mites are the four most commonly seen types of harmless & generally beneficial vivarium microfauna. Springtails & Isopods are both species you'll need to manually introduce to your vivarium to get a population started. Detritivore mites & free-living nematodes are also commonly found living in live vivariums, but aren't usually introduced manually. These tiny critters are nearly impossible to avoid, since they are found nearly everywhere on earth, and are impervious to most processing techniques. Both of these common vivarium guests usually offer nothing but benefits to the environment, and are not generally a concern. For a whole lot more information about vivarium microfauna, check out our Vivarium Construction 102 article.
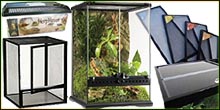
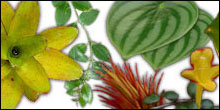
New to vivarium building, and eager to get started? We've been there! It's important that you 1'st see the full picture of what you'll need to build your vivarium start-to-finish, for the specific species you are working with. Be sure that you've decided on all of the necessary basics before beginning to purchase supplies, including: the terrarium itself, a drainage layer substrate, a screen separator, substrate, plants, microfauna, and lighting. It's best to research the benefits & drawbacks of each category's products, as builds can range considerably depending on your goals. Plant choice is especially important, so research the care for each plant species you choose to ensure it's size, lighting, watering, and humidity requirements match those of the vivarium's inhabitants. Learn more about proper plant & decor choices in our Vivariums 101 Guide.
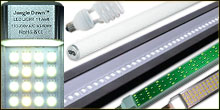
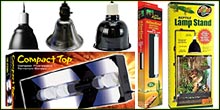
We frequently receive "lighting problem" emails from those who haven't used a recommended lighting solution (or equivalent). A light source which doesn't provide enough PAR light at plant-level has environmental implications beyond "how fast a plant will grow". On the other hand, choosing an inappropriate horticultural bulb which promotes "excellent plant growth" might not produce a naturally accurate color temperature, and can leave a vivarium's environment looking silly with a blue, purple, or pink hue. There are plenty of appropriate, inexpensive options (especially for shorter enclosures), but the importance of selecting an appropriate light source can't be understated. If you'd like to learn more about illuminating your vivarium, we've got two options which might help. Vivarium Lighting 101 discusses all the important theory behind illuminating a vivarium, and discusses the pros & cons of many lighting types in detail. Our Vivarium Lighting Kits use all the data discussed in our Vivarium Lighting article, and applies it to creating a few lighting options for 30 different enclosure sizes. (Just select your enclosure and you'll see what we'd recommend)
That concludes the introductory vivarium checklist article!
If you have time & would like to learn a bunch more, visit Vivarium Construction 101
Thanks for choosing us as your vivarium info source!
We hope you'll choose us as your vivarium supply source, too! 
Vivarium-Related Kits
 Base Kits
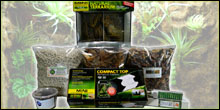 Complete Kits
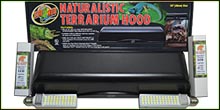 Lighting Kits